Learning how to create custom WordPress meta boxes allow you to make professional UI elements for yourself and your clients. This WordPress meta box tutorial will show you how to add admin UI elements to the edit post/page screens.
Important Before you begin reading, you might want to read Take Your WordPress Meta Box to the Next Level. This PHP class will let you create meta boxes fast with the flexibility you need as a developer. Full documentation walks you step-by-step. Create custom WordPress Meta Box UI elements for your projects with ease.
Creating a custom WordPress meta box lets you make clean UI elements for you and your clients. The default WordPress custom fields are functional, but IMHO, and if you can pull it off, using a WordPress meta box is the way to go. It will give your project that professional touch.
This WordPress meta box tutorial will show you how to quickly add a clean UI for some custom fields. You will even learn how you can hide these fields and prevent them from appearing in the custom fields area.
Getting Started with WordPress Meta Boxes
The code for your meta box will pretty much go in one of two places: in a plugin file or in your functions.php file. This tutorial will cover the latter (for those of you creating plugins, you will be able to adapt the code for your use as well). I like tutorials with code examples and lots of comments, with that said, lets dive right in:
I recommend that you download the sample files or cut + paste the code and markup below in the appropriate places as indicated. There are three sample files (you will also need to create a folder and name it custom):
/current_theme_folder/functions.php
/current_theme_folder/custom/meta.php
/current_theme_folder/custom/meta.css
/current_theme_folder/functions.php file:
<?php
define('MY_WORDPRESS_FOLDER',$_SERVER['DOCUMENT_ROOT']);
define('MY_THEME_FOLDER',str_replace("\\",'/',dirname(__FILE__)));
define('MY_THEME_PATH','/' . substr(MY_THEME_FOLDER,stripos(MY_THEME_FOLDER,'wp-content')));
add_action('admin_init','my_meta_init');
function my_meta_init()
{
// review the function reference for parameter details
// http://codex.wordpress.org/Function_Reference/wp_enqueue_script
// http://codex.wordpress.org/Function_Reference/wp_enqueue_style
//wp_enqueue_script('my_meta_js', MY_THEME_PATH . '/custom/meta.js', array('jquery'));
wp_enqueue_style('my_meta_css', MY_THEME_PATH . '/custom/meta.css');
// review the function reference for parameter details
// http://codex.wordpress.org/Function_Reference/add_meta_box
// add a meta box for each of the wordpress page types: posts and pages
foreach (array('post','page') as $type)
{
add_meta_box('my_all_meta', 'My Custom Meta Box', 'my_meta_setup', $type, 'normal', 'high');
}
// add a callback function to save any data a user enters in
add_action('save_post','my_meta_save');
}
function my_meta_setup()
{
global $post;
// using an underscore, prevents the meta variable
// from showing up in the custom fields section
$meta = get_post_meta($post->ID,'_my_meta',TRUE);
// instead of writing HTML here, lets do an include
include(MY_THEME_FOLDER . '/custom/meta.php');
// create a custom nonce for submit verification later
echo '<input type="hidden" name="my_meta_noncename" value="' . wp_create_nonce(__FILE__) . '" />';
}
function my_meta_save($post_id)
{
// authentication checks
// make sure data came from our meta box
if (!wp_verify_nonce($_POST['my_meta_noncename'],__FILE__)) return $post_id;
// check user permissions
if ($_POST['post_type'] == 'page')
{
if (!current_user_can('edit_page', $post_id)) return $post_id;
}
else
{
if (!current_user_can('edit_post', $post_id)) return $post_id;
}
// authentication passed, save data
// var types
// single: _my_meta[var]
// array: _my_meta[var][]
// grouped array: _my_meta[var_group][0][var_1], _my_meta[var_group][0][var_2]
$current_data = get_post_meta($post_id, '_my_meta', TRUE);
$new_data = $_POST['_my_meta'];
my_meta_clean($new_data);
if ($current_data)
{
if (is_null($new_data)) delete_post_meta($post_id,'_my_meta');
else update_post_meta($post_id,'_my_meta',$new_data);
}
elseif (!is_null($new_data))
{
add_post_meta($post_id,'_my_meta',$new_data,TRUE);
}
return $post_id;
}
function my_meta_clean(&$arr)
{
if (is_array($arr))
{
foreach ($arr as $i => $v)
{
if (is_array($arr[$i]))
{
my_meta_clean($arr[$i]);
if (!count($arr[$i]))
{
unset($arr[$i]);
}
}
else
{
if (trim($arr[$i]) == '')
{
unset($arr[$i]);
}
}
}
if (!count($arr))
{
$arr = NULL;
}
}
}
?>
/current_theme_folder/custom/meta.php file:
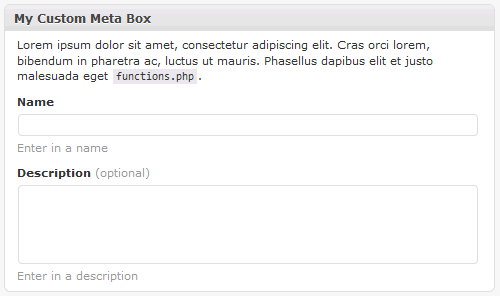
<div class="my_meta_control"> <p>Lorem ipsum dolor sit amet, consectetur adipiscing elit. Cras orci lorem, bibendum in pharetra ac, luctus ut mauris. Phasellus dapibus elit et justo malesuada eget <code>functions.php</code>.</p> <label>Name</label> <p> <input type="text" name="_my_meta[name]" value="<?php if(!empty($meta['name'])) echo $meta['name']; ?>"/> <span>Enter in a name</span> </p> <label>Description <span>(optional)</span></label> <p> <textarea name="_my_meta[description]" rows="3"><?php if(!empty($meta['description'])) echo $meta['description']; ?></textarea> <span>Enter in a description</span> </p> </div>
/current_theme_folder/custom/meta.css file:
.my_meta_control .description
{ display:none; }

.my_meta_control label
{ display:block; font-weight:bold; margin:6px; margin-bottom:0; margin-top:12px; }

.my_meta_control label span
{ display:inline; font-weight:normal; }

.my_meta_control span
{ color:#999; display:block; }

.my_meta_control textarea, .my_meta_control input[type='text']
{ margin-bottom:3px; width:99%; }

.my_meta_control h4
{ color:#999; font-size:1em; margin:15px 6px; text-transform:uppercase; }
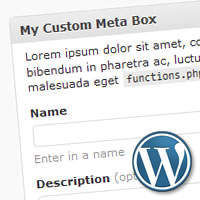
If you’ve set everything up correctly you should see the following meta box in a edit post or edit page screen:
Using The Meta Box Values In Your Template
Being able to create the values is just the first part, now you need to do something with those values. Most likely you will be displaying the values in your post or page templates.
Remember the example above uses a single variable (_my_meta) to store values as an array, so when you get the meta value back from WordPress it will be an array and you will have to access the values using array syntax. Doing this is pretty straight forward:
$my_meta = get_post_meta($post->ID,'_my_meta',TRUE);
echo $my_meta['name'];
echo $my_meta['description'];
The global $post variable should always be available, but here are some other methods you can use to get the current post or page ID which you will need to use with get_post_meta():
// using $post global variable
echo $post->ID;

// get a page by its path (recommended over using a page ID)
$page = get_page_by_path('company/contact-us');
echo $page->ID;

// if you are working in the loop
echo get_the_ID();
The above code and markup will help you produce clean UI elements for your next WordPress project. Like any tutorial, consider this a starting point for you to do great things. I hope you’ve enjoyed!
how to echo this to my theme function?
To test out the code above, the easiest thing to do is to download the sample files and give it a try, you’ll get the hang for how it works and you will be able to modify it to your liking.
Elegant code and works properly on page or posts, but no luck with Custom Post Types in WP 3.0. Changed
foreach (array('post','page') as $type)toforeach (array('feature') as $type). Then the metaboxes only showed up on that custom post type which is great. But when I enter in the fields text, after clicking save it does not save. Changedif ($_POST['post_type'] == 'page')toif ($_POST['post_type'] == 'feature')as but still no luck. Also tried adding:// check autosavebut still no luck.if (defined('DOING_AUTOSAVE') && DOING_AUTOSAVE) {
return $post_id;
}
Desperately trying to figure this out before tomorrow morning, but will stay up all night til I get it. Thanks in advance!
Cheers,
Christopher
Tried installing on the latest version of WP 3.0. Works for Posts but doesn’t seem for custom post types. Changed ==page to == the name of my custom post type. Have it set to only show the boxes on that post type, and everything appears to work but when you enter in data it does not save. Tried adding do not autosave as this article recommends but still no luck. Any ideas anyone? http://osdir.com/ml/wp-testers/2010-03/msg00205.html
Hi,
I have everything set up looking perfect in the add page section of the site, but how do I get the value to show up in my template?
I’m trying: echo get_post_meta($post->ID, ‘_my_meta’ true);
Which echo’s “Array” in my template.
Any guidance would be very much appreciated.
Tom, the the current setup I propose above, does use an array … so as you’ve noticed when you echo an array it outputs “Array” … to inspect the variable you can try:
In your template you would do the following:
Thanks for the comment, I will update the post above with further info to make this how to complete.
Perfect, thanks a lot man!
I’m trying to get the meta data to display and right now it is showing nothing. Data saves and updats in post. When I print_r the results, I get a 1. Any idea what I might be dong wrong.
$arr = get_post_meta($post->ID,'_my_meta',TRUE);echo $arr['link'];
By the way, does it make a difference if I have set up a custom post type (events).
Luke, I assume you are using WordPress 3.0 (beta). I did a test install, setup a custom post, and tested the code above … all seems to work.
I assume you can see the meta box in the post admin area, you probably already updated the following line:
foreach (array('post','page','events') as $type) ...Things to check: make sure you are getting the correct “post_ID”, you might also check the “wp_postmeta” table and confirm that the “_my_meta” key is being set for the post.
Dimas,
Thanks for the reply. I did get this working using WP 3.0 Beta 1 (current version of nightly build). I checked the DB for _my_meta and it was there along with checking the post_ID being correct.
I ended up having to call the
global $post;. So in the events template:global $post;
$arr = get_post_meta($post->ID,'_my_meta',TRUE);

echo $arr['link'];
echo $arr['description'];
Thanks again for the reply. This is by far the cleanest, organized and easiest way I’ve found to accomplish this. I’ve had luck with other methods but again, this is much more friendly way of doing it. Great post!
(I hope this doesn’t submit a numerous amount of times, it didn’t appear to show up initially.)
Dimas,
I’m not sure if you have used Gravity Forms (www.gravityforms.com) before or not. It is the best thing out there for forms and even lets you create a post by submitting the form info into custom posts. I have this working with the exception of it posting the custom fields into the “User Friendly” way you’ve provided in this post. I wanted to pick your brain to see what you might suggest as to what the custom field value may be (4 screenshots below to help)
http://dl.dropbox.com/u/2557221/0-form-setup.png
Gravity Form Setup – This allows the post to submit a custom field. What would I set the custom field value as?
http://dl.dropbox.com/u/2557221/1-form-preview.png
Form Preview – You can see the fields and the values being set.
http://dl.dropbox.com/u/2557221/2-added-to-events.png
It’s been added to “Events” – After submitting, it shows it posted to the Events Custom Posts.
http://dl.dropbox.com/u/2557221/3-custom-fields.png
Custom Fields View – This shows the custom fields being set as shown, although not in the “User Friendly” area you’ve demonstrated here.
Thanks in advance for any thoughts you might have. I really appreciate it!
Hi! Is there a way to show customized meta-boxes UI on each category?
For instance.
Category 1
custom_field 1
custom_field 2
Category 2
custom_field 1
custom_field 3
Luke, as you’ve read with the above tutorial, I find it easier to: use a single variable, submit data via array notation, and save/use an array into the
wp_postmetaDB table.I haven’t used Gravity Forms before, but by looking at your screenshots it appears as if it would be best to enter in the custom field names individually (meaning you would not have one custom field name to store all the data).
Certain parts of the code above would need modification, primarily the
my_meta_setupfunction (to get the individual name/value pairs) and themy_meta_savefunction (to save the individual name/value pairs).Before posting this tutorial I was using a similar setup, where I used one-to-one name/value pairs for my custom fields, but that setup got a little cumbersome for me pretty quickly, so i tried to simplify and that is what you see above.
If you need some samples of my old code I can send it to you, just email me at dimas3 [at] farinspace [dot] com
Christopher, your post got marked as SPAM by Akismet (I apologize for not seeing it sooner), I hope you’ve gotten what you needed working! Let me know otherwise…
Donalyza, I don’t see why you couldn’t have dynamic meta boxes and/or dynamic fields. You could have certain fields be displayed or hidden based off certain post properties, in this case categories:
So, following the tutorial above, in your
/current_theme_folder/custom/meta.phpfile, you could use the following to display certain fields when the post is assigned to certain categories:I hope I’ve understood your question correctly and that the above helps you.
Thank you! I was able to make it to work. You just made my day. 🙂
Dimas,
Thank you for the reply. Actually, still experiencing the problem. When I follow your instructions for custom meta boxes on WP 3.0 for the normal post type, works perfectly. When I use it for a custom post type I created, all the boxes show up however when I enter in information into a metabox and click save, the content in those boxes disappear. I can post some code, but first is their anything off the top of your head that might cause this, that I should for first? Thanks Dimas!
Chris, I’ve made some modifications to the code above in the
functions.phpfile, so try the latest and see if that works for you…Thanks for the update. I updated to your new code, but it still does allow me to save in the boxes unfortunately. Also with the new code, now when I try to save in a normal post that does not work either. Where is before that did work, and it only didn’t work in custom post types. I have you functions.php code at the end of my own functions file for the site. I pasted the part of the file that relates to the issue: http://pastie.org/949123 If you get a chance maybe you can see where I’m going wrong, or point me in the right direction. To note, on this line foreach (array(‘post’,’work’,’page’) as $type) I only left post and page for testing, but I will ultimetly only wanting the metaboxes to show on the work post type. So foreach (array(‘work’) as $type) Thank you!
Actually, now I’m thinking maybe the problem is in my meta.php file. I created names for each field but now sure if I did it properly. http://pastie.org/949140
I think I’m definitely over quota on posts here today. But I noticed in the meta.php file I uploaded, I misspelled ‘url’ as ‘u’. Fixed that but still no luck. And tried you meta.php unchanged and still no luck on saving. Thanks again in advance. I’ll keep trying different things here to see if anything works. So close!
Chris, I used your Pastie code for
functions.phpandmeta.phpand was able to get it working as expected.Your last variable
_my_meta[url]has a small typo:_my_meta[u]try the following to see where the saving function is failing: http://pastie.org/949174
It’s good to know it’s working for you at least as the problem must lie else where in my code. (where I haven’t been looking!).
I had fixed the typo prior but no luck. check1,check2,check3 all where echoed as well as the rest of the code. http://pastie.org/949220
The last line however said Warning: Cannot modify header information – headers already sent by (output started at /dev/wp-content/themes/mytheme/epanel/custom_functions.php:465) in /dev/wp-includes/pluggable.php on line 887
To note: 465 is echo “check-1” the start of the function my_meta_save
Does this mean I am using that same function name somewhere else? Your debugging tip certainly is pushing me in the right direction.
Cheers
Now this is odd, so I tried changing the function name: my_meta_save to my_meta_saves in both locations. And it worked! Then I tried putting them both back to my_meta_save and it still works. Even after emptying my cache several times. I have no idea if using the debug script once, or changing the function name once somehow refreshed something or what. So strange, but looks like I’m good now. Thank you for sticking it out with me. If I can figure out exactly what fixed the issue I’ll be sure to post for other readers.
Now that I have been able to save meta box data successfully due to the dedicated help of Dimas I needed to figure out how to display the inputs in the template. The code above by Luke worked perfectly in WP 3.0b2. Everything is finally working as it should.
Dimas,
Thanks for the reply and advise.
What you said makes perfect sense of why I wouldn’t be able to set valued pairs. Also, as you mentioned, the setup other ways is very cumbersome. Since then, I’ve managed to build a pretty nice Events Custom Post page (thanks to your code) to replace using Gravity Forms. Still use GForms in many other ways.
I appreciate your willingness to offer up your old sample code.
The problem seems to be back. That is I was adding several new posts in my custom post type each were letting me save to the new meta boxes, then all of the sudden the next one I created it stopped working. Didn’t change any code. Tried emptying browser cache, restarting etc. It’s so odd. I will try running your debug script above even though that technically shouldn’t fix it, but did last time some how. Very odd.
Figured out the issue. When I create a new post it works, I was editing posts I had already created prior to whatever change I made to the code that resolved it. (maybe the misspelling of the “url”. Thanks again!
Dimas,
What would be a good way to add multiple meta boxes (e.g. Required Info, Optional Info)?
I’ve done this with your script by adding a second custom.php called
custom2.php. It’s the same script I just had to change some function names and nonce name (e.g.my_meta_inittomy_meta_init2).I played a bit with adding another
add_meta_boxand including the othercustom2.php. I’ll mess around more later but I thought I would get your thoughts if possible on how to possibly reference onecustom.phpfile and have the ability to add multiple meta boxes by including different files undermy_meta_setup(or some other function).This works great! Thanks for sharing. I am trying to implement the conditions on the meta.php file. Do you have an idea what condition I’d use to limit the meta boxes to pages of a certain template?
Normally I’d use if_is_pagetemplate(‘template.php’) but the admin page itself is not actually using the template in question. Maybe I need to pull the meta data in the template field and use that?
Kathy, in your
my_meta_initfunction you can try the following:$post_id = $_GET['post'] ? $_GET['post'] : $_POST['post_ID'] ; $template_file = get_post_meta($post_id,'_wp_page_template',TRUE); if ($template_file == 'home.php') { ... }or in your
meta.phpfile you can try the following (note that the$postvar is available in themeta.phpfile):$template_file = get_post_meta($post->ID,'_wp_page_template',TRUE); if ($template_file == 'home.php') { ... }Adding the condition to the my_meta_init function worked great. Thanks again!
btw- have you seen this tut: http://www.deluxeblogtips.com/2010/05/howto-meta-box-wordpress.html
your 2 tuts have helps immensely on this subject.
Great, I’m glade it worked out for you and thanks for the link.
Similar to that tutorial, my next update to this series of meta box articles will include a easy helper class for creating one or many meta boxes.
In the latest nightly build they have changed how cutom post types are registered which I am told will break current 3.0 versions.
http://wpdevel.wordpress.com/2010/05/13/earlier-this-week-nikolay-committed-a-c/
Could you do follow up code on how to make your code work with the updated version of 3.0? I’ll also try taking a stab on it on my own tonight.
Chris, thanks for the info. I’ve updated my local dev version of wordpress and all still seems to work OK.
Additionally, I’ve developed a helper class for creating meta boxes, see: Take Your WordPress Meta Box to the Next Level
Excellent, thanks. You da man. =)
Thanks so much for a brilliant tutorial!!! I’ve followed it to the letter and got it all working… only the text fields in the admin area are only 170px wide and I can’t fathom out how to make them wider!!!!
I’ve created the path…
wp_enqueue_style('my_meta_css', wp-folder/theme folder . '/custom/meta.css');perhaps I’ve completely messed this up? I’ve tried alternative paths without success!
Louisa
@Louisa, If you haven’t already checked out my latest code WPAlchemy_MetaBox do take a look, it improves upon this tutorial tremendously …
as for your CSS you may want to try something like this:
if (is_admin()) wp_enqueue_style('custom_meta_css',TEMPLATEPATH . '/custom/meta.css');TEMPLATEPATHis a wordpress constant (remember it as it is a useful one) …Thanks for the super fast reply!!! I used the WPAlchemy_MetaBox code and it’s brilliant! Everything works perfectly! Thank you so much!
Thanks again!!!
Louisa
Hello again!!!!! Sorry to ask another question!!!
What’s the best way to add images using the WPAlchemy meta boxes?
I’m adding this file path…
to meta.php
ImageOne
<input type="text" name="the_name(‘imageOne’); ?>” value=”the_value(‘imageOne’); ?>”/>
Add the first image here
and to my post_template.php
the_value(‘imageOne’);?>
I’m getting the image in my meta boxes which is fine but it’s a little difficult to delete!
Thanks!!!!!
Oh, the above didn’t quite come out properly! Sorry! Hope this makes more sense!
Included in single_template
the_value('imageOne');?>
Included in meta.php
Top Image
<input type="text" name="the_name('imageOne'); ?>" value="the_value('imageOne'); ?>"/>
Add image one here
The image code added to the custom meta box
@Louisa, my recommendation for letting users add images is to direct users to use the default wordpress media upload feature. In the meta box you then basically ask to a URL of the image.
I personally find that this helps the end user get familiar with the default features of wordpress and how they work.
However, there may be cases where you want to create an “upload” form field and have a user select a file to upload. In these cases you will need to modify the “save” function to handle the uploaded file (put it in the correct directory and such).
Thanks Dimas!!!! I was doing something really really weird before which is why I mentioned the image being difficult to delete!!
Adding sections of information into WordPress is now so much easier!
Thanks again!
Hello! It’s Louisa again! Sorry to pester AGAIN but I was wondering if it’s at all possible to have a wysiwug html/visual editor field right bang smack in the middle of the meta boxes rather than being perched on top of the page?
For example… say I want list the meta boxes like so
1. “add heading here” meta box
2. “add introduction here” meta box
3. “add image here” meta box
4. THEN have the wysiwug html/visual editor field here.
5 .”add another image here” meta box
Thanks!!
Hope you have a brilliant weekend!
Louisa, great question, you’ve inspired me to write an article about it:
How to Move and Position The WordPress WYSIWYG Visual Editor
And it’s an absolutely brilliant article!!! Thanks!!!!!!
Louisa
Hi mate,
Congrats on the work! Let me ask you a question, is it possible to control where add_meta_box will fire?
For example, I have a category called Events and another one called News, I have an events area created with magic fields and a plugin.
I want a certain metabox to appear only on the Events (new and edit) posts.
If you could clarify anything to me I will be very pleased.
Thanks a lot Dimas
Eduardo, Be sure to check out my WordPress Meta Box PHP class, there is a filtering section which will let you filter by categories.
Dimas:
Great tutorial!
I was wondering if you could give me some tips on how to have a rich text editor on textareas inside the metabox. Maybe extending the built-in tinyMce that already appears on the default editor?
Dimas,
Great tutorial! With the data being serialized in the database, is there anyway to delete a single value from the array? I tried using wordpress’ delete_post_meta function, but I’m officially stumped! thanks for any help/guidance!
Tyler
Tyler, as you’ve already noticed, the code uses an array to store its data. The
my_meta_clean()function will clean that array when items are deleted (are emptied). For instance: when you clear the data from a form field the array will be cleaned.I am going to be working on a new version of the WordPress Meta Box PHP class which will allow the developer to choose how the data is stored, via an array or via the classic WordPress name/value scheme.
You need to add
add_action('edit_post','my_meta_save');to themy_meta_initfunction. That will save changes.Keep in mind that
edit_postaction gets fired on post/page edit and on comment add/edit … here is what WordPress says aboutedit_post:“Runs when a post or page is updated/edited, including when a comment is added or updated”
I believe the
save_posthook is the correct action to use in this case.That’s EXACTLY what I’m after… thanks so much
This is just awesome! I created a custom post type but I also wanted to have specific information included and I searched and searched and couldn’t find anything that worked. Until your tutorial! Works perfectly! Thank you very much!
One thing though I took out the wp_enque_style for the meta.css as it wasn’t working and just did a link to the style sheet in the meta.php file. Works like a charm.
Also to Christopher B – A big thanks to you as well – u ran into some issues I was having i.e. defining the post type and after reading all your comments (lol) i got it to work. Nicely done.
Hey Dimas,
In what way is it possible to import meta data using CSV format?
I took a look at the SQL backend and saw that it makes an array in the meta field and I am not sure of a plugin that could do something like that.
I do recall a CSV importer but I dont believe it does meta data..
Noel, I think the default WordPress export/import functionality will work with
wp_postmetadata as well.If you were to write a plugin to do this, it shouldn’t be too hard either, you basically would have to select * from a table and write it as a CSV file with PHP. Unfortunately I don’t know of anything that would do this easily for WordPress.
If you can’t find anything ready available you mighty be able to do it with phpMyAdmin as a data export, additionally I use Navicat for MySQL and it has options to export MySQL tables as CSV and the like.
Where are these fields being saved? I don’t see them in the custom post meta, and I don’t see where to specify where it’s saved.
Matt, the above example saves all the data as a serialized array in the wp_postmeta table (“_my_meta” in the example above) … If you haven’t yet taken a look at wpalchemy, it uses the same technique but also provides a way to save individual entries, plus a lot more options…
Hi, I use more and more your great function it’s helpfull.
However I’ve a problem.
In a custom template page I try make a custom query to order shop by zip code
:
the_meta();
$zipcodep=$meta[‘zipcode];
?>
–
the query don’t work (query_posts(‘post_type=shops)), works.
I hope you can help me!
Thank so much for this, Dimas. I was beating my head against the wall with Sitepoint’s article on this. You’ve made some drastic improvements here, and it’s working great for me!
Nate, be sure to take a look at wpalchemy for even easier meta box creation.
Hi Dimas, i’ve been reading through your info on meta boxes and post types. I’m pretty stuck on a couple of things, any help would be great!
1) I’ve added to custom post types to a site, they work fine. The problem is the meta boxes I add on the page then show up in all other pages (normal pages, not just the custom post type) once the page has been published. The show up as custom fields. There are now lots of them and I could really do with getting rid of them, can’t i just limit them to the page i want them to show on?
2) This is related to your meta box stuff. Rather than make a custom post type for my home page, i’d like to make a completely bespoke layout in the admin area. When editing a page with my home.php template i’d like to style 4 boxes, the same as the look on the front-end. This makes it obvious which bit your editing and looks just like the page. I would also need tinyMCE to show up in each one i suppose, so the client could choose links/headings/etc. Ive followed your article on adding meta boxes, I managed to get one to show up on the home.php template but it didn’t look right, and all the other stuff like title, editor, revisions etc were still there. I have a feeling this might be because i need the remove_meta_box function or whatever it is. Any ideas at all how i go about achieving this custom back end?
Sorry for the long post, but i’m pretty damn stuck 🙁
Thanks, Dan
Dan, be sure to take a look at wpalchemy for even easier meta box creation … this should help you out, using tinyMCE within the meta boxes is a little bit more tricky, I have a post related to that also.
Top notch tutorial! Does anyone know how to enable wpautop on the custom meta created in the above example?
Thanks for sharing. What is the license on this?
Great tutorial, truly helpful.
I had two quick questions:
1. I would like to pull the Metabox title to display next to the data, how would I do that?
2. One of my fields is an img url, how would I pull this onto the page?
Thanks in advance,
14ner
@14ner, please have a look at wpalchemy … its all the above, but better, packaged up for you … with good documentation …
This is a great tutorial, but you missed out the part about custom meta boxes in a plugin menu screen, for example a settings area. I have written a quick article to show also how simple that is!
http://thewebsolutionprovider.com/wordpress/wordpress-tutorials/custom-wordpress-meta-box-for-your-plugins/
You are a fkn legend. This helped me so much, and now i’ve converted it to do options pages etc as well.
Thanks for this post, just found it on Google and it’s answered a few questions. Now on to the actual development!
I have to second Andy’s question. Does anyone know the approach to adding the wpautop filter to the textarea meta boxes?
when i went through as per the tutorial it is success. But the main problem that occured to me is when i tried to change the custom menta field value it is not working. Do you have any idea i would be grateful to you.
I’m trying to put a input file, but it doest work. Can you help me? Thanks
Andrea, take a look at WPAlchemy, you can use the
save_actionand look at the$_FILESphp global.Nice tutorial, it’s working great! Thanks!
But I have a question for you. How can I use the WP_Query from here: http://codex.wordpress.org/Function_Reference/WP_Query#Custom_Field_Parameters
I have 2 checkboxes in my template and I want to display the loop if a checkbox is checked.. but I don’t know how to use that in meta_query
Can you help?
Thank you Dimas 😉
@Cippo, hopefully you’ve read the messages up top and some of the comments which point others to wpalchemy … have a look at it for creating super easy meta boxes and also look at this for help with WP_Query.
In my rush, I didn’t see how simple it was … d’oh.
The query part for meta looks like this:
                    'meta_query' => array(
                        array(
                            'key' => '_my_meta',
                            'value' => 'addtosidebar',
                            'compare' => 'LIKE'
                        )
                    )
and I was trying to make it ‘key’ => ‘_my_meta[addtosidebar’ and it didn’t want to work. Yes, I admin that I’m not a PRO at PHP 🙂 .. yet.
But THANKS for sharing the code, very helpful!
I did not understand how to use the file type in the class, so i continued using your first article.
i put this to test and does not return to me a value.
get:
return:
$new_file_data = $_FILE[‘_my_meta’];
print_r($new_file_data);
forget, i’m a stupid 🙂
i forgot the S on $_FILES
Hi,
Really flexible custom meta box solution, thankyou 🙂
I’m trying to create a select box, any ideas how to incorporate this with your script?
Matt
@Matt, I hope you’ve gotten a chance to take a look at wpalchemy, it’s the next incarnation of the above.
As a developer I like flexibility, to me flexible means a good mix between configuration and convention. I’ve tried to keep the form setup separate from the functionality, so just liek you would define input fields, you can do the same for select boxes, check boxes, raido buttons, etc.
Hi,
when add checkbox or radio button for example
with
jacket
t-shirt
update post and add in single.php
it’s ok but i=when return into admin area and try to change some value all field was reset.
Why my choice in admin panel is not save?
Sorry for my English
@Dimas
Thanks for the wpalchemy link, just playing around with it now, must say i’m highly impressed.
Cheers
I just put this code after my thesis functions on the functions.php and all my thesis meta boxes disappeared and it just added this meta box… =/
Hi Dimas
Would u be so kind to explain how the my_meta_clean() work ?
It calls itself inside the loop ?
i just want to understand how it works, rather than copy and use it.
any level of explanation is much appreciated.
@Paul, it basically loops a single or multi-dimensional array and cleans it up, looking for empty values. The function uses itself because it recursively checks any nested array values.
A user (Franz) of my wpalchemy class suggested the following tip: using
array_filter()(without the callback) also does a similar filtering … I am not sure if it will properly filter a multi-dimensional array but it appears to do a good job filtering.Also the function has changed a bit since my early versions (from above), the latest function looks like this (this is what wpalchemy currently uses):
https://gist.github.com/1068596
Hi Dimas
Thanks a whole lot for the explanation and the link to revised code.
( really appreciate your help and generosity )
hi i am creating a wordpress theme can you please help ?
the code is not working on the page of wordpress ,it work on the post ,
the box are show on every post and pages but the values not show in my template ,(yes i use the above code in my template )i check the html they retun nothing but in the post they working well
@fahim, I would really recommend that you use wpalchemy else try using http://gist.github.com to post your code so myself and other can review and help
there is nothing a new which i add in your code, i just download the code and put them according to instruction
i grab the values on the both template page
a blog template page (index.php) and the single.php a (a single blog post page),i set the index as a home page
the problem is that when i put the values on the blog page ( a wordpress page not a post ) page not show them
but when i put the values in the single post then both home page (index.php) and single post page(single.php) show them (both page and the post show the values)
i dont want to use meta box in post , i want to use them in the pages
for both page and post the $post->ID Work ?
i dont know anything about them , In the wordpress both page and post meta data access by get_post_meta function, there is no difference ?
Please Reply as soon as possible
how to disable drag & drop feature for metabox?
Thanks for this, it’s fantastic and very easy to setup.
I have one problem though, the meta data writes to the database okay, and displays on the site correctly, but when I go back into the Edit Page screen, the custom boxes are blank again.
Any idea why that would be?
Hi, Scrap that!!!
Just noticed I needed to change the meta names in the meta.php input boxes.
All working now, fantastic article. Thank you!
@Craig, I hope you’ve gotten a chance to take a look at wpalchemy, it’s the next incarnation of the above.
Hi, I hope Dimas or someone can assist with a problem I’m having. First let me describe what I’m up to: I am creating a custom post type for ‘portfolio’. Because the small thumbnails in the proposed portfolio galleries are not the same image as the one they will link to. I decided to use wpalchemy to create the custom meta boxes that would allow me to add two images at a time to a ‘portfolio’ post for the purpose of matching up the thumb with the larger image and then being able to drag and drop to reorder them.
I have also employed scripts to be able to access the wp media loader for each of these custom fields, upload an image and put it’s URL into the custom field.
Everything works, but one frustrating problem. Upon saving the post, the field sets duplicate so there are two of any recent additions when the edit page reloads… it is creating extra entries for a reason I can’t seem to track down…
A symptom that may point to part of the problem. When you go to create a new ‘portfolio’ the regular media upload button shows that there are no attachments to the post. However, when the media uploader pops up in relation to filling in the custom fields, it remembers every image that has been uploaded to this custom post type, as if there were attached to the new post… not sure if this is related.
In any case, there are three documents worth looking at (I posted on GIT hub: https://github.com/seahoss/shareCode), the three documents which contribute are: ‘functions.php’, ‘file-upload.js’, and ‘meta_portfolio_images.php’
Any help you can provide is greatly appreciated.
Thanks its a fantastic help
Hello! Any example for showing a list posts from a custom post type with custom meta boxes?
Thanks so much for this tutorial!
I got an problem with the “function save_details(){
global $post;
update_post_meta($post->ID, “example”, $_POST[“example”]);”.
Sometimes it just don’t save it, after I click “Update post”, it gone.
Any ideia?
Does the custom meta box appear for all posts and page dashboards in the admin? Can I have the meta box(es) appear in only certain type of pages?
Hello,
Thanks for a great tutorial. Everything is work for me. But there is one problem… how I add a select box in meta.php ? I add like:
Current Status
<option value="Pending">Pending
<option value="In Process">In Process
<option value="Shipped">Shipped
<option value="Delivereds">Delivered
Choose Status
but its not work. Please tell me how I add select, radio & checkbox ?
Thanks again.
Hello!
Thank you very much for this tutorial, you have just saved med allot of time on a project Im working on.
Wish you a great day and thank you again for your time and making your knowledge available to the rest of us.
Best regards Victor
Awesome! You saved me research time so now I can work on modifying this to suit my needs. It’s working perfect for me and retrieving _my_meta in the template file. Just a little modification and parsing and this is perfect for adding meta key words to the head of any page template.
This is great.. I have one question.. how do I add the parts to my post within the loop..
I tried something this but it didn’t work
Hi
Thanks for a great insight to metaboxes!!
However I would like to use the standard:
ID,’metaA’,true) ) : ?>
ID, ‘metaA’, true) ?>
How does that work with your method?
Kind regards
And without coding ;o)
if ( get_post_meta($post->ID,’dato1′,true) ) :
echo get_post_meta($post->ID, ‘dato1’, true)
endif
trying to get the output of one of my text areas to display as a list of links. here’s what i got but it isn’t working. please help. thanks!
ID, ‘_presentation_title[“links”]’, true);
if($source){
$source = explode(“\n”, $source); ?>
<? for($i = 0;$i
<a href="”>
oh i’m guessing my code wasn’t displaying. here’s the link i got the code from and just replaced CUSTOM_FIELD_NAME with _presentation_title[“links”]
but it’s still not outputting anything.
try gist.github.com for your code … also if you haven’t tried wpalchemy, give that a go, its documented and you might just fall in love.
it took me forever to figure the code out above, it’ll take me forever x2 to figure wpalchemy lol i’ll try it out though. do you think i’ll be able to output a list of links like the link i showed you earlier?
The install videos are pretty basic, additionally there are some examples that should get you up and running pretty quickly, and it has a nice handy repeating fields feature.
wpalchemy essentially abstracts the code above, making it easier to handle and use.
where to use this comment ??
i mean in which file ??
$my_meta = get_post_meta($post->ID,’_my_meta’,TRUE);
echo $my_meta[‘name’];
echo $my_meta[‘description’];
Wonderful tutorial. Worked perfect for me.
Namskar,
Everything is work for me.Thanks for a great tutorial.
Dude,
This is awsome. It works like a charm.
So I’m using it!
However I would like to extend the fields listed in the meta box. I do this in the mets.php file. Every field I create works however I come across one thing that I can’t seem to get working.
I want to add an upload-file field so the user (CMS-end not front-end) can upload a image.
I created the field and I can select the file I would like to upload. Now I need a button that sais “Upload”. The problem is not how to create the button but the problem is how to upload the file.
Maybe this has nothing to do with your script and it should be done with some PHP, but I hoped you have a solution for me!
Thnx in advance.
Oh and did I mention that your tutorial is Awsome!
M.
When I update a page the metabox data is not saved.
I made a few basic changes that I assume should not affect the ability to save.
Instead of running this as part of a theme I added it to a plugin, so the changes I made are: I include the main.php file from may plugin, I changed the path from the theme dir to the plugin dir.
I metabox shows up, the css is applied, it works like normal but I can not save the metabox data.
I am on wordpress 3.4.2
Thanks,
for this document of the wp meta box
this is work grate
For adding the files through wordpress meta box. See full tutorial at: http://wordpressapi.com/2010/11/22/file-upload-with-add_meta_box-or-custom_post_type-in-wordpress/
Looks good, but adding combobox is quite difficult, Hope this article may helpful for adding combo box in meta boxes area. http://buffercode.com/simple-technique-add-custom-meta-box-wordpress-admin-dashboard/